Recipe by [Author Name]. [Author Name] is a passionate home baker and culinary expert with over X years of experience perfecting apple recipes for families across America. Their dedication to foolproof techniques and delightful flavors ensures every dish from applerecipes.us is a success.
Introduction: The Quintessential Taste of Fall
There’s something magical about the aroma of cinnamon-spiced apples bubbling beneath a golden, crunchy oat topping that transforms any kitchen into the heart of autumn. Apple crisp represents the perfect marriage of tender, caramelized fruit and a satisfying crumble that delivers textural contrast in every bite. This beloved dessert offers all the comforting flavors of traditional apple pie with half the effort and twice the rustic charm.
Our tried-and-true recipe eliminates the guesswork, ensuring your apple crisp achieves that coveted balance of jammy apples and irresistibly crunchy topping every single time. Whether you’re a novice baker or seasoned home cook, this comprehensive guide will walk you through every crucial detail, from selecting the ideal apple varieties to mastering the perfect crumble technique. Get ready to create a dessert that’ll have your family asking for seconds before they’ve finished their first serving.
For more seasonal inspiration, check out our comprehensive guide to baking with apples to discover endless possibilities for your apple harvest.
Why This Apple Crisp Recipe is Your New Go-To
This isn’t just another apple crisp recipe—it’s your secret weapon for creating bakery-quality results at home. Our method emphasizes the science behind the perfect crumble, ensuring your topping stays delightfully crunchy while the apples below transform into a lusciously spiced filling. We’ve eliminated common pitfalls like soggy toppings and watery fillings through precise ingredient ratios and foolproof techniques.
Unlike many recipes that leave you guessing, ours provides clear visual cues and troubleshooting tips that guarantee success. Plus, we’ve included variations and customizations that accommodate different dietary needs and flavor preferences, making this truly your ultimate go-to dessert for any occasion.
II. Choosing the Best Apples for the Perfect Crisp
The foundation of exceptional apple crisp lies in selecting the right apples. Not all varieties perform equally in baked desserts—some turn to mush while others remain stubbornly firm. Understanding how different apples behave when heated helps you make informed choices that directly impact your crisp’s final texture and flavor profile.
The ideal apple for crisp strikes a balance between maintaining some structure during baking while softening enough to create that perfect spoon-tender consistency. Consider factors like natural sugar content, acidity levels, and pectin structure when making your selection. These characteristics determine whether your apples will hold their shape, release appropriate moisture, and develop those beautiful caramelized flavors we all crave.

H3: The Role of Apples in Apple Crisp
Different apple varieties bring distinct characteristics to your crisp based on their cellular structure and chemical composition. High-pectin apples like Granny Smith maintain their shape well but can remain tart, while low-pectin varieties like Red Delicious may break down too completely, creating an overly soft filling.
The ideal apple balances firmness with the ability to soften gradually, releasing natural juices that combine with spices and thickeners to create a cohesive filling. Sugar content affects both sweetness and browning, while natural acidity helps balance flavors and prevents oxidation. Understanding these relationships empowers you to choose apples that complement rather than fight against your recipe’s goals.
H3: Our Top Apple Recommendations for Crisp
Honeycrisp tops our list for its exceptional balance of sweet and tart flavors, plus its ability to hold shape while developing tender, juicy flesh. These apples create the perfect textural contrast against a crunchy topping.
Granny Smith offers reliable performance with firm flesh that softens beautifully while maintaining some bite. Their tartness provides excellent flavor balance and prevents overly sweet results.
Braeburn delivers complex, spiced flavors with naturally firm flesh that bakes evenly. Their moderate sweetness reduces the need for additional sugar.
Jonagold combines the best of Jonathan and Golden Delicious varieties, offering honey-like sweetness with enough acidity to prevent mushiness.
For consistent results, avoid soft varieties like Red Delicious or McIntosh, which can turn to applesauce during baking. Check out our detailed guide on choosing the best apple varieties for any recipe for more comprehensive information, or consult the USDA’s comprehensive apple guide for detailed variety characteristics.
H3: The Art of the Apple Blend
Consider combining two or three apple varieties for more complex flavor and texture profiles. Pair a tart variety like Granny Smith with a sweeter option like Honeycrisp, or blend firm apples with slightly softer ones for varied textures throughout your crisp. This approach creates layers of flavor that keep each bite interesting while ensuring consistent results.
III. Crafting the Ultimate Crunchy Oat Topping
The difference between good apple crisp and extraordinary apple crisp lies entirely in the topping. A properly executed oat crumble should shatter satisfyingly under your spoon, revealing buttery clusters that complement rather than compete with the tender fruit below. Achieving this texture requires understanding the relationship between fat, flour, and oats, plus mastering the mixing technique that creates those coveted golden clusters.
Many home bakers struggle with soggy toppings that lack definition and crunch. Our method eliminates this frustration by focusing on ingredient temperature, proper ratios, and mixing techniques that encourage cluster formation while preventing overworking. The result is a topping that maintains its crunch even after baking and cooling.
H3: The Anatomy of a Perfect Topping
A superior oat topping relies on cold butter creating steam pockets as it melts, forming the flaky layers that become golden clusters. The combination of flour and oats provides structure, while sugar adds sweetness and promotes browning through caramelization.
The key lies in maintaining butter in small, distinct pieces rather than fully incorporating it into the dry ingredients. This technique ensures irregular clusters form during baking, creating textural variety throughout the topping. Brown sugar adds moisture and complex molasses notes, while a pinch of salt enhances all flavors and balances sweetness. Understanding these principles helps you troubleshoot texture issues and customize your topping’s characteristics.
Learn more about the science of baking fats and flours to deepen your understanding of these techniques.
H3: Key Ingredients for Maximum Crunch
Old-fashioned rolled oats provide the signature texture and nutty flavor that defines apple crisp. Avoid quick oats, which break down too completely during baking.
Cold unsalted butter, cut into small cubes, creates the flaky layers essential for crunch. Keep butter refrigerated until ready to use.
All-purpose flour binds ingredients together and provides structure for cluster formation.
Brown sugar adds sweetness and moisture while promoting golden browning through its molasses content.
Ground cinnamon complements apple flavors and adds warmth to the topping.
Salt enhances all flavors and balances the sweetness without being detectable in the final product.
Optional: chopped pecans or walnuts add extra crunch and richness for those who enjoy nuts in their desserts.
H3: The Technique: Creating That Signature Crumble
-
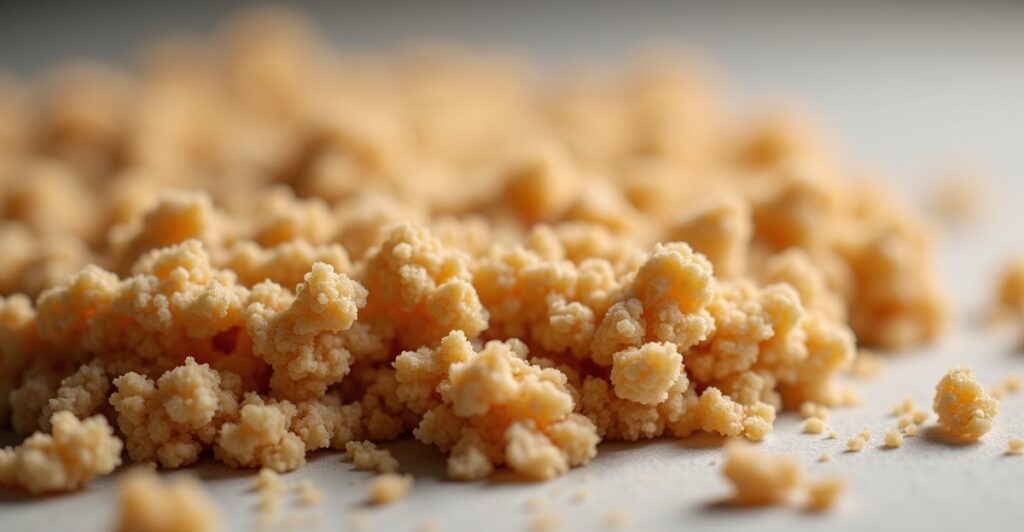
Combine dry ingredients in a large bowl, whisking together oats, flour, brown sugar, cinnamon, and salt until evenly mixed.
-
Add cold butter pieces to the dry mixture, using your fingertips or a pastry cutter to work butter into ingredients until mixture resembles coarse crumbs with some larger, pea-sized butter pieces remaining.
-
Don’t overwork the mixture—stop when you see irregular clusters forming. Overworking creates a dense, uniform texture rather than the varied crumble we want.
-
Chill the mixture for 15 minutes before using for extra-crispy results, as cold topping creates more steam and better texture contrast.
IV. Preparing the Flavorful Apple Filling
While the crunchy topping gets most of the attention, a perfectly spiced apple filling provides the soul of great apple crisp. Your filling should balance sweetness and tartness while achieving just the right consistency—tender apples in a lightly thickened, flavorful syrup that won’t make your topping soggy.
The secret lies in understanding how apples release moisture during baking and using the right combination of thickeners and spices to create harmony between all components. Proper preparation ensures your filling complements rather than competes with that beautiful crunchy topping.
H3: Essential Filling Ingredients
Fresh apples (about 6-8 medium) form the foundation, peeled and sliced into uniform pieces for even cooking.
Granulated sugar sweetens the filling while drawing out natural apple juices that create the syrupy base.
Ground cinnamon provides warmth and classic apple pie spicing that pairs beautifully with baked fruit.
Fresh lemon juice brightens flavors, prevents apple browning, and adds acidity that balances sweetness perfectly.
Cornstarch or flour thickens the natural juices released during baking, preventing a watery filling that could make your topping soggy.
Vanilla extract adds depth and rounds out all the other flavors without being overpowering.
Pinch of nutmeg (optional) provides subtle complexity that elevates the overall spice profile.
H3: Assembling the Filling
Toss sliced apples with sugar, cinnamon, lemon juice, and thickener in a large bowl until evenly coated. Let the mixture sit for 10-15 minutes to allow apples to release some moisture and spices to distribute evenly. This brief resting period helps create a more cohesive filling that bakes evenly throughout.
V. The Step-by-Step Perfect Apple Crisp Recipe
Now that you understand the principles behind perfect apple crisp, let’s put it all together into a foolproof recipe that delivers bakery-quality results every time. This comprehensive approach ensures success whether you’re a first-time baker or experienced home cook looking to refine your technique.
H3: Gather Your Ingredients & Equipment
For the Apple Filling:
- 6-8 medium apples (mix of Honeycrisp and Granny Smith), peeled and sliced
- ½ cup granulated sugar
- 2 tablespoons all-purpose flour
- 1 tablespoon fresh lemon juice
- 1 teaspoon ground cinnamon
- ½ teaspoon vanilla extract
- Pinch of nutmeg (optional)
For the Oat Topping:
- 1 cup old-fashioned rolled oats
- ¾ cup all-purpose flour
- ¾ cup packed brown sugar
- ½ cup cold unsalted butter, cubed
- 1 teaspoon ground cinnamon
- ½ teaspoon salt
Equipment:
- 9×13-inch baking dish
- Large mixing bowls
- Pastry cutter or clean fingers
- Sharp knife and cutting board
H3: Step-by-Step Baking Instructions
-
Preheat your oven to 350°F (175°C) and lightly grease a 9×13-inch baking dish with butter or cooking spray.
-
Prepare the apple filling by combining sliced apples, granulated sugar, flour, lemon juice, cinnamon, vanilla, and nutmeg in a large bowl. Toss until apples are evenly coated, then transfer to your prepared baking dish, spreading into an even layer.
-
Make the oat topping by whisking together oats, flour, brown sugar, cinnamon, and salt in another large bowl. Add cold butter cubes and work into the dry ingredients using your fingertips or a pastry cutter until mixture resembles coarse crumbs with some larger pieces.
-
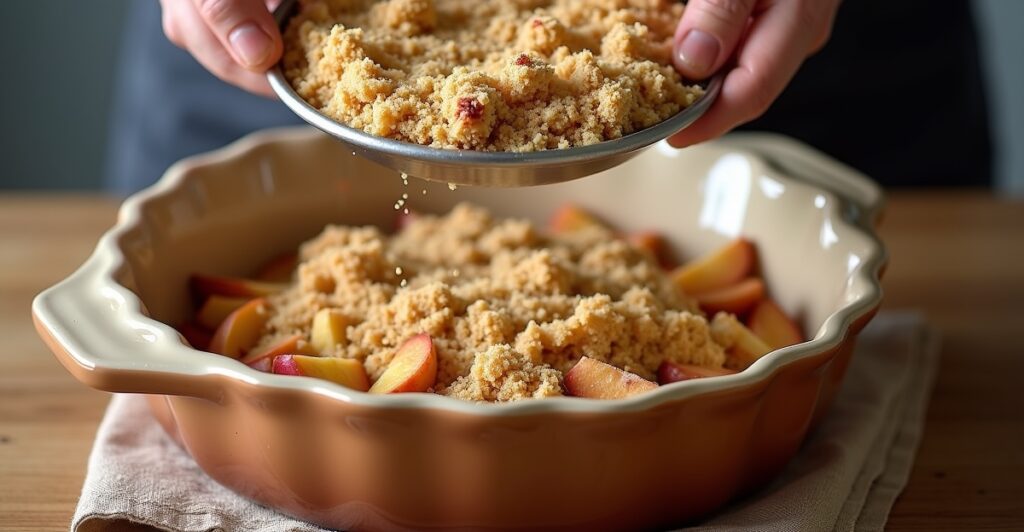
Assemble the crisp by sprinkling the oat mixture evenly over the prepared apples, covering completely but avoiding packing down the topping.
-
Bake for 45-55 minutes until the topping is golden brown and apples are bubbling around the edges. The topping should sound crispy when tapped lightly with a spoon.
-
Cool for at least 15 minutes before serving to allow filling to set properly and prevent burning your tongue on molten apple filling.
Baker’s Note: If your topping browns too quickly, cover loosely with foil during the last 15 minutes of baking. The crisp is done when you can see bubbling around the edges and the topping sounds hollow when tapped.
Ready to bake? Try this perfect apple crisp recipe today!
For more inspiration, explore more classic American apple desserts to expand your seasonal baking repertoire.
VI. Troubleshooting: Avoiding Common Crisp Calamities
Even experienced bakers encounter occasional setbacks when making apple crisp. Understanding common problems and their solutions builds confidence and ensures consistently delicious results. Most issues stem from ingredient ratios, technique, or timing—all easily correctable with the right knowledge.
Let’s address the most frequent challenges home bakers face and provide practical solutions that work reliably every time.
H3: Soggy Topping? Here’s Why & How to Fix It
Soggy toppings usually result from too much moisture in the apple filling or insufficient butter in the crumble mixture. Ensure you’re using enough thickener (flour or cornstarch) in your apple mixture to absorb excess juices. Cold butter is crucial—warm butter incorporates too completely, preventing the cluster formation that creates crunch.
Quick fixes: Add an extra tablespoon of flour to wet apple filling, increase butter slightly in the topping mixture, or bake an additional 10-15 minutes until the topping sounds crispy when tapped. Next time, try chilling your assembled crisp for 15 minutes before baking for extra insurance against sogginess.
For more in-depth troubleshooting tips for fruit fillings, check out our comprehensive guide.
H3: Watery Filling: Causes and Cures
Watery fillings occur when apples release more moisture than your thickener can handle, often due to very juicy apple varieties or insufficient thickening agents. Some apples naturally contain more water, while others release moisture differently based on storage conditions and ripeness.
Solutions: Increase your thickener (flour or cornstarch) by 1-2 tablespoons, let cut apples sit with sugar for 15 minutes before baking to draw out excess moisture, or choose firmer apple varieties. If your filling is already watery, continue baking uncovered until excess moisture evaporates and the filling thickens naturally.
H3: Beyond the Basics: Other Potential Issues
Uneven browning often indicates hot spots in your oven—rotate the dish halfway through baking for more uniform results. Undercooked apples suggest your oven temperature is too low or baking time too short; increase temperature by 25°F or extend baking time. Overly sweet or bland results call for adjusting your sugar-to-acid ratio by adding more lemon juice or reducing sugar slightly.
VII. Delicious Variations & Customizations
Once you’ve mastered the basic technique, apple crisp becomes a canvas for creative expression. These variations accommodate different dietary needs and flavor preferences while maintaining the fundamental appeal of crunchy topping over tender, spiced fruit. Each adaptation builds on the solid foundation you’ve already learned.
H3: Gluten-Free Apple Crisp
Replace all-purpose flour with your favorite gluten-free flour blend in both filling and topping, using a 1:1 ratio. Ensure your oats are certified gluten-free, as conventional oats may contain wheat contamination. Add an extra pinch of xanthan gum to the topping mixture if your flour blend doesn’t contain it, helping achieve better cluster formation and crunch.
The results taste virtually identical to traditional apple crisp with proper flour substitution and technique.
H3: Spice It Up: Beyond Cinnamon
Experiment with cardamom and ginger for Scandinavian-inspired warmth, Chinese five-spice for exotic complexity, or maple extract with a pinch of cayenne for grown-up sophistication. Fresh thyme pairs surprisingly well with apples, while orange zest brightens the entire dessert.
Start with small amounts—about ¼ teaspoon of strong spices like cardamom—and adjust to taste in future batches.
For even more creative combinations, explore more modern apple flavor pairings and advanced baking techniques in our comprehensive guide.
H3: Nutty Additions & Other Mix-Ins
Fold chopped pecans, walnuts, or almonds into your oat topping for extra crunch and richness. Dried cranberries or raisins mixed with the apples add chewy texture contrasts. A handful of granola incorporated into the topping creates interesting textural variety, while coconut flakes provide tropical notes that complement apple’s natural sweetness beautifully.
H3: Cooking Methods: Crock Pot Apple Crisp
Adapt this recipe for slow-cooker convenience by reducing liquid ingredients slightly and cooking on low for 3-4 hours. The topping won’t achieve the same crispiness as oven-baked versions, but you’ll get deliciously tender apples with a satisfying crumble texture. This method works particularly well for potlucks or when oven space is limited.
For more creative applications, explore other apple slow-cooker recipes that showcase this versatile fruit’s potential.
VIII. Serving Suggestions & Best Practices
Proper serving and storage techniques ensure your apple crisp maintains its appealing textures and flavors from first serving through delicious leftovers. Understanding how to present and preserve your creation maximizes enjoyment and minimizes waste.
H3: What to Serve with Apple Crisp
Vanilla ice cream remains the classic pairing, providing cool creaminess that contrasts beautifully with warm, spiced fruit. Fresh whipped cream offers lighter accompaniment, while caramel sauce adds decadent richness.
Sharp cheddar cheese provides a traditional New England pairing that balances sweetness with savory depth. Greek yogurt with honey creates a healthier option that maintains creamy contrast. For special occasions, try cinnamon whipped cream or maple mascarpone for elevated presentation.
H3: Storing and Reheating Apple Crisp
Cover cooled apple crisp tightly and refrigerate for up to 4 days. For best results, reheat individual portions in a 350°F oven for 10-15 minutes to restore topping crispness—avoid microwaving, which makes toppings soggy.
Freeze assembled but unbaked crisp for up to 3 months, baking directly from frozen with an additional 15-20 minutes cooking time. Baked crisp freezes for 2 months but may lose some topping texture upon reheating.
Frequently Asked Questions (FAQs)
Note: Content optimized for FAQPage Schema
H3: How do I make my apple crisp topping extra crunchy?
Use cold butter, don’t overmix your topping, and chill the assembled crisp for 15 minutes before baking. The key lies in maintaining distinct butter pieces that create steam pockets during baking. For more detailed techniques, see our topping section.
H3: Can I make apple crisp ahead of time?
Yes! Assemble completely and refrigerate for up to 24 hours before baking, or freeze unbaked for up to 3 months. Add 10-15 minutes to baking time if cooking from cold. Baked crisp keeps refrigerated for 4 days and reheats beautifully in the oven.
H3: What’s the difference between apple crisp and apple crumble?
The terms are often used interchangeably, but apple crisp typically includes oats in the topping while apple crumble uses only flour, butter, and sugar. Both feature the same concept of fruit topped with a streusel-like mixture, but crisp has more textural variety from the oats.
H3: Can I use frozen apples for apple crisp?
Absolutely! Thaw frozen apples completely and drain excess liquid before using. You may need to increase your thickener slightly and extend baking time by 10-15 minutes. The texture will be slightly softer than fresh apples but still delicious.
Conclusion: Your Perfect Apple Crisp Awaits!
Armed with this comprehensive guide, you’re ready to create apple crisp that rivals any bakery or restaurant version. Remember that great baking comes from understanding principles rather than just following recipes—knowing why techniques work empowers you to adapt and troubleshoot confidently.
The combination of carefully selected apples, properly executed crunchy topping, and attention to detail transforms simple ingredients into something truly special. Whether you stick with our classic version or explore creative variations, the foundation you’ve learned here ensures delicious results every time.
Most importantly, apple crisp represents more than just dessert—it’s about creating warm memories and bringing people together around the table. Every golden, bubbling dish carries the promise of comfort and connection.
Share your perfect apple crisp creations in the comments below! We’d love to hear about your favorite variations and serving suggestions.
Explore more irresistible apple recipes on applerecipes.us! Discover more classic apple desserts that showcase this beloved fruit’s incredible versatility.